![]()
![]()
Portrait Work
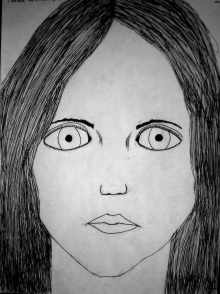
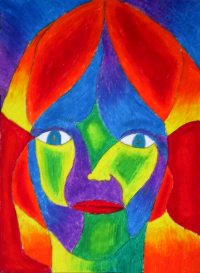
Self Portrait Tessa
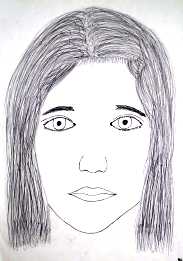
Andrea
By
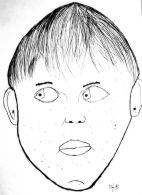
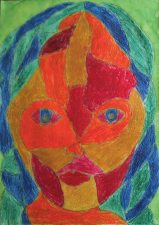
Nick Hoole aged 8 by Andrea age 9 By
Brigette age 11
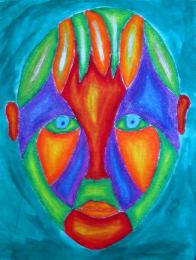
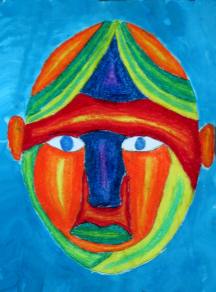
Green Eyes by Ben Stevens Red Lady Master of Disguise by Tessa Williams Age 9 By Rachel Kay
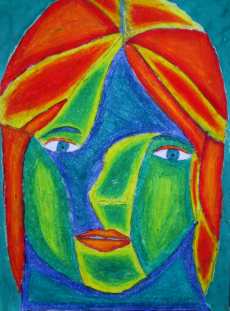
Green
Girl Robo
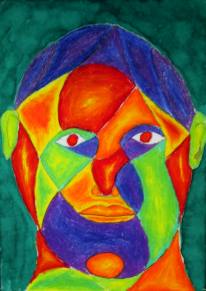
Man
By Sussana Till age 10 By
Nick Hoole aged 8

Rainbow
Lamajor Mr
Blend
By Anthony Walker age 11 Sam
Gemmell age 10
Junior Panels by
Junior Panels by
By Noline Madden By
Jack Shanks
Line Drawings scanned into the computer and coloured using Paint
Brush.
This was a fun and easy extension activity for the junior
students.
Steps involved in teaching and leading this project.
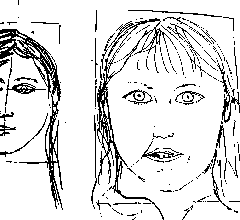 Photo of teachers modelling portrait.
Students first discussed all the different parts and features on
the face and we made a list of these elements on the board.
Then students sketched portraits of a partner sitting directly across
from each other. For their first portrait I modeled the steps in
sketching a portrait. It helps to cut the paper they are using into
A4 or A3 proportions which fits the face well.
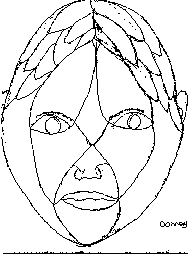
Starting with the egg shaped oval -suggest they make a mark approximately 2cm in from each side in the middle of each length width and swing arks placing their hand inside each curve and holding the pencil high swing it like a compass. Rotate the paper so that the hand drawing the circle is always on the outside.
Next mark the vertical center line, the horizontal line for the eyes half way, the little above half way from the eye line to the bottom for the bottom of the nose, dividing the space between the nose and the bottom into thirds and the bottom of the top lip goes on the second third up, dividing the eye line up into fifths for the eye spacing, model steeper arch on the top inside of each eye, pupil position, drop vertical guide lines down from the pupils to get the approximate width of the mouth...
Discuss how to use your pencil as a proportion measurer and encourage them to really look at their partners once they have the proportions and are actually drawing a particular feature.
The students then had a practice at repeating this process for home work sketching a family member while they are watching the TV -always a perfect opportunity or a self portrait using a mirror.
Students could then use one of these sketches or repeat the process again (using a partner) to produce a final portrait that they would develop further. These sketches were mostly done on A4 or a little smaller and all were then blown up to A3 using the photocopier.
Students used these copies to work out their divisions
and natural shapes. This process was modeled on the board encouraging
them to find the shapes and simplify areas. Sometimes continuing
strong lines on to create new shapes that flow or look interesting
works well.
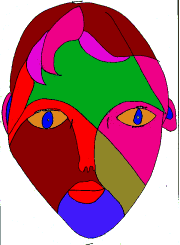
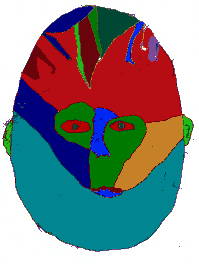
 This shows how one student
interpreted his shapes.
This shows how one student
interpreted his shapes.
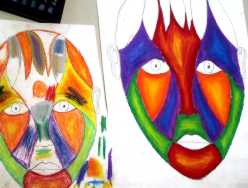
This working development can then be traced onto a piece of cartridge using a window if the lines are to light. The working copy is then used by students to practice and plan out the colours that they want to use.
It is helpful to teach students the colour wheel and mixing shades and tints and blending colours prior to working out their colours. An important key they need to know is that when blending is that you can mix any two primary colours together but mixing three or a secondary that contains the third will give you mud... Try this!
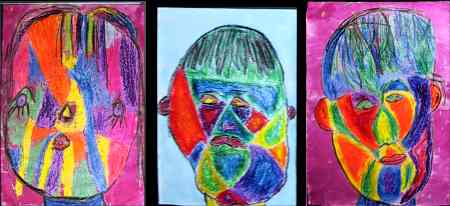
I like to use pastels with students
and they have a very rich and bright finish.

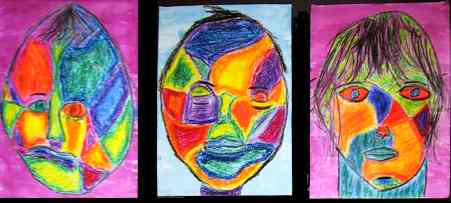
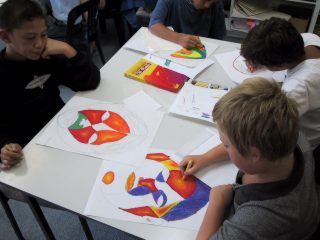
These three pictures show the next steps:
-(center) practicing blends and working out colours on the working
copy,
-(Left) Ben working on one shape at a time with a piece of clean
paper under his hand, these tricks protect the art from smudging.
These students are working very hard and it is important to move
around and encourage all students. Look out for when they are starting
to get tied and pack it up before standards slip. I had one student
who found this work demanding and could only complete two or three
shapes at a time.
Once the pastel work had been finished some had bare backgrounds and so they choose a dye colour to paint around...
|
Back |